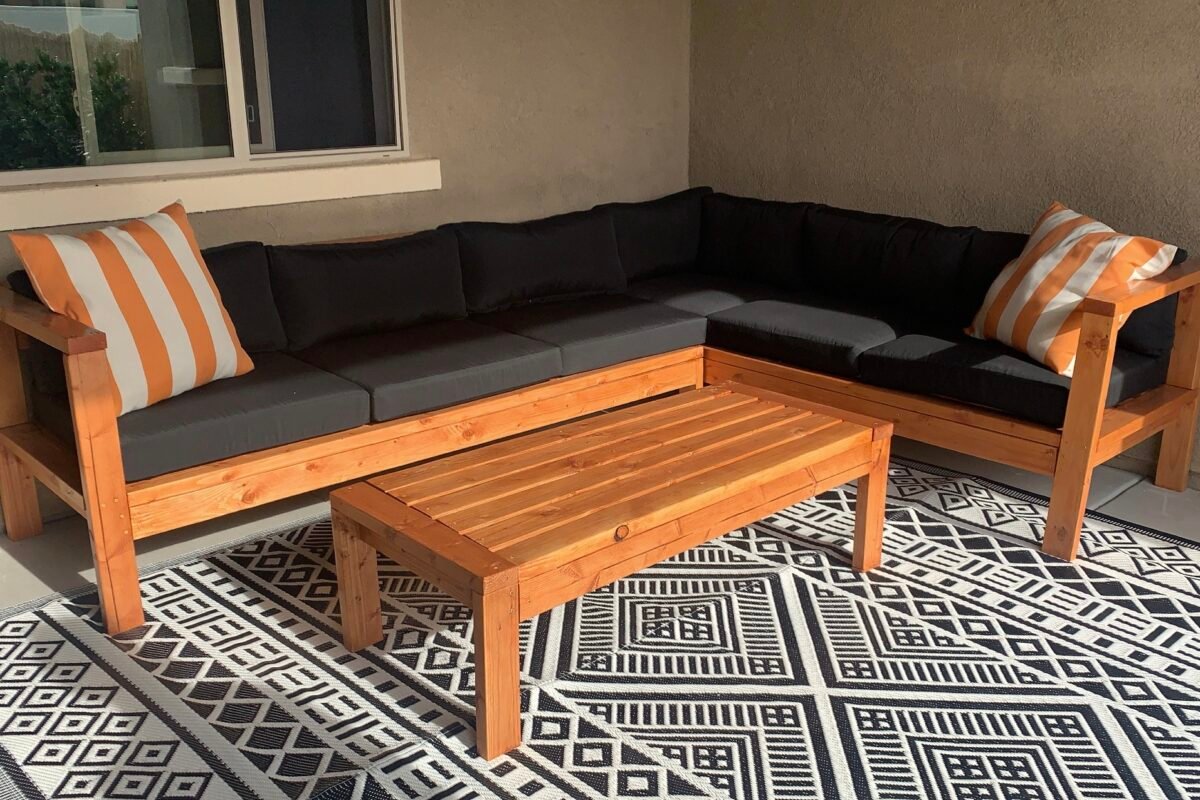
I knew I wanted a large and comfortable outdoor seating area, and after looking online I was either in sticker shock, or not liking anything. So I decided to try to see about building our own – because that’s way more rewarding anyways!
I found plans by Ana White and followed the idea, but created our own custom dimensions based on the cushions that we chose.
Here are the links to the plans, but I will go over each below with our measurements edits:
- One Arm Outdoor Sofa – 1/2 of sectional
- Outdoor Sofa – 1/2 of sectional or free standing sofa?
- Coffee Table
First up, let’s cover what we needed to make this happen (besides the wood & cuts. I will discuss those as soon as we get to that section)
Tools Needed:
As always, I linked everything on Home Depot so that you can click, add to cart, order online, and pick up or deliver to make your life EVEN easier! (It’s free!)
We already owned these tools, but if you don’t; trust me they will come in handy for many DIY projects to come! These are staple pieces to add to your tool collection.
- Compound Miter Saw – $134 – to cut all the wood down (we had home depot cut the big pieces down to fit in our SUV. Note, they will only do 1 cut per piece of wood. You will have to do the extra cuts yourself. This saw has come in handy, it isn’t too bulky, and it is a great price!
- Drill – $79 – To drill in all the screws. We love this one, and the kit is SUCH a value!
- Measuring Tape – $5.98 – To measure all the cuts
- Speed Square – $6- To make sure nothing is put together crooked
- Kreg Jig – $39.97 – This handy tool makes pocket holes to be able to attach certain pieces.
- Power Sander – $39.97 – A must, the 2x4s come pretty rough and will need a really good sanding.
Other Supplies Needed:
- 3″ Deck Screws – there is a 1 lb or 5 lb option. We got the 5lb, because we can use them for other projects too! We needed about 2 pounds worth of screws.
- Wood Stain – $6.98 – We used the color Honey Pecan and loved the color
- Outdoor Poly Spray – $10.28 – This helps seal, protect, and smooth the surface. We used about 3 cans to do a few good coats.
Cushions:
These cushions are not cheap, but they also are not expensive! You really can’t find anything cheaper. I tried and ended up ordering just the covers (blonde moment!) These are super great outdoor quality, and very comfortable. The cuts I am providing are built for THESE CUSHIONS.
Total cost for cushions: $709
- 5 Regular Cushions – $112 – We chose the color black, but there are 11 other colors to choose from.
- 1 Corner Cushion – $149 – This is for the corner seat, as it needs 2 back cushions instead of one 🙂
- 8×10 Outdoor Rug – $69.99 – Such a good price + it is a waterproof material, so the white will never get dirty! I figured I would link it because it is such a good find. As seen in our cover images of the couch we built.
Don’t want to build it?
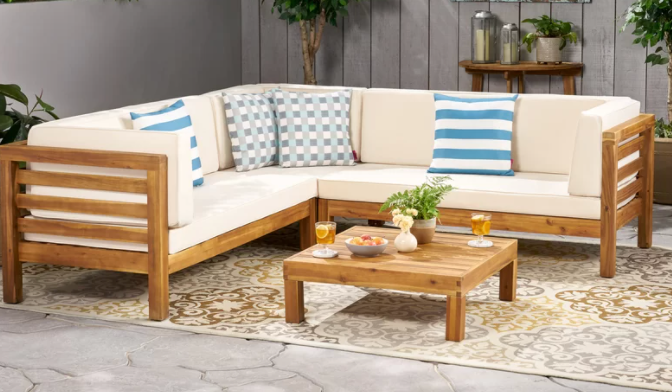
This is a great alternative for only $899 on sale right now! Honestly, this couch is even cheaper than the wood and cushions for the couch we built. But it is a little smaller, and not handmade with love. This couch looks fabulous though, and does come in a few different colors.

Now let’s talk cuts! Then, I will go over how to build it. The entire project is made with 2x4s!
As mentioned above, home depot will only do 1 cut per piece of wood for you. We decided to get all of our big cuts done there and use the scrap for the other cuts we would make at home. This way they also (just barely) fit in our SUV.
We opted to start with the 12ft 2x4s because it was more cost effective to start big and cut down. You can go bigger, but just remember, Home Depot will only do 1 cut. So make sure it will fit in your car.
We needed a total of 23 12ft 2x4s for this project.
We used the variety called Better Prime Douglas Fir Board which is $9.36 / piece. Bringing our total Lumbar cost to: $215.28
IMPORTANT: I will give you the cut list that you will see on her plans crossed out, then cuts we used in bold, and then below all of it will be the Home Depot Cut list.
One Arm Sofa Cuts:
(3) 2×4 @ 70-1/2″👉 (3) 2×4 @ 78″(10) 2×4 @ 25-1/2″ (includes back support)👉 (10) 2×4 @ 28.5″(1) 2×4 @ 12-1/2″👉 (1) 2×4 @ 12.5″(6) 2×4 @ 72″👉 (6) 2×4 @ 79.5″(1) 2×4 @ 70-3/4″ (back support–cut to fit)👉 (2) 2×4 @ 78.25″ – we used an additional back support for the middle of the back cushion.
Sofa Cuts:
(9) 2×4 @ 72” (or cushion width x times 3)👉 (10) 2×4 @ 79.5″ – we have one extra again for the extra back support(13) 2×4 @ 25-1/2” (or cushion depth plus 1-1/2″)👉 (13) 2×4 @ 28″- (
2) 2×4 @ 28-1/2” (or cushion depth plus 4-1/2″)👉 (2) 2×4 @ 31″
Coffee Table Cuts:
For the coffee table we used all the same measurements 🙂
- (4) 2×4 @ 14-1/2” – Legs
- (2) 2×4 @ 23-1/2” – Breadboard Ends
- (5) 2×4 @ 20-1/2” – End aprons, Supports
- (8) 2×4 @ 47” – Side Aprons, Tabletop Boards
Home Depot Cut List
Start by finding (23) 12ft 2x4s that are AS STRAIGHT AS POSSIBLE. You will have to search a bit through them to find the best ones that are not warped. Lay them flat on the ground to test this. Also test the side, as it can warp in any direction.
Once you have all 23 pieces you want to use, grab someone to do 1 cut on all of them. Here are the cuts:
- 16 pieces cut @ 79.5″
- 3 pieces cut @ 78″
- 2 pieces cut @ 78.25″
- 1 piece cut @ 78.5″
- 1 piece cut @ 63″ – this board will be used to make all 20.5″ cuts from
Now, I didn’t track which boards I used for which cuts, but from the scraps you will have enough to make all of the other cuts at home. So, make sure to be strategic with utilizing the “scrap” pieces for all of the other cuts.
Now let’s chat tips and tricks!
- This is much easier as a two person job! One person can help hold and keep things straight, while the other screws together.
- Cut first, then sand.
- I am not sure what is easier, to build then stain, or stain then build. We built then stained, but it was definitely harder to get in the cracks. However staining before would require drying then doing the other side… This is really up to you.
- Stain with a rag! So much faster than a paint brush omg!
Building:
For this part I will default to the original instructions provided by Ana White. She drew up some great graphics that show how all of the pieces fit together. All you have to do is compare her measurements to the ones I put on mine to know which piece goes where, but it’s pretty foul proof.
Here are the links to the plans:
- One Arm Outdoor Sofa – 1/2 of sectional
- Outdoor Sofa – 1/2 of sectional or free standing sofa?
- Coffee Table
Back reinforcement:
As mentioned we did add a few extra back support pieces. I will add a photo with instructions for this this weekend.
Answering Your Questions:
How hard is this project?
Super easy in my opinion! All you need to do is cut and screw together! If you can follow simple instructions, this will be a breeze,
How long did this take?
It was actually fairly quick, the cuts were easy to do, then all you do is screw it together. The longest part is the sanding and staining. I would say in total it took us about 4-5 hours.
How much did the whole thing cost?
For us, we already had all of the tools, so the only costs were for the wood, stain, poly, screws, and cushions. The total cost of that without tax was: $961.54


